Various Ways to Host React app: AWS Amplify
In this blog series we discuss various ways to host a React app in AWS.
Although, there are many ways a react app can be hosted in AWS infrastructure, In this series, we will discuss 3 of them on this blog series:
- Using AWS Amplify
- Using EC2 instance/ Lighsail instance
- Using S3 bucket
AWS Amplify:
AWS Amplify is a cloud hosting solution offered by Amazon, that offers an easier way to host full-stack serverless web solutions with continuous Integration and support for git based workflows.
It provides a set of tools and libraries that can support easy integration of your frontend or a full stack web application with various amazon services.
Amplify Hosting supports many common SSR frameworks, single-page application (SPA) frameworks, and static site generators:
SSR framework supported: Next.js, Nuxt, Any SSR framework with a custom adapter
SPA frameworks supported: React, Angular, Vue.js, Ionic, Ember
SSG framework supported: Eleventy, Gatsby, Hugo, Jekyll, VuePress
Features of Amplify hosting:
- Support for various Web Framework including Next.js, React, Vue, Angular
- Supports Managed hosting service for web apps
- Easy setup and management of Custom domains and SSL
- Support for team collaboration with roles and permissions
- IOS and Android support with SDK
- Support for various backend development, including GraphQL , NoSQL databases , authentication using Amazon Cognito, storage using s3, REST api , serverless function with lambda
- Support for analytics and monitoring
- Availability of UI admin tool and CLI support
How to set up a basic react app in AWS amplify?
Although you can upload react built file directly to AWS Amplify but It is recommended to manage using git workflow which can be applicable for any size of app:
Before actually starting deploying the react app, following are the prerequisites:
- AWS Account
- A react app in remote repository(Amplify support one of : GitHub, Bitbucket, GitLab, and AWS CodeCommit)
Now Let’s begin
Step 1 : Open the AWS amplify service page
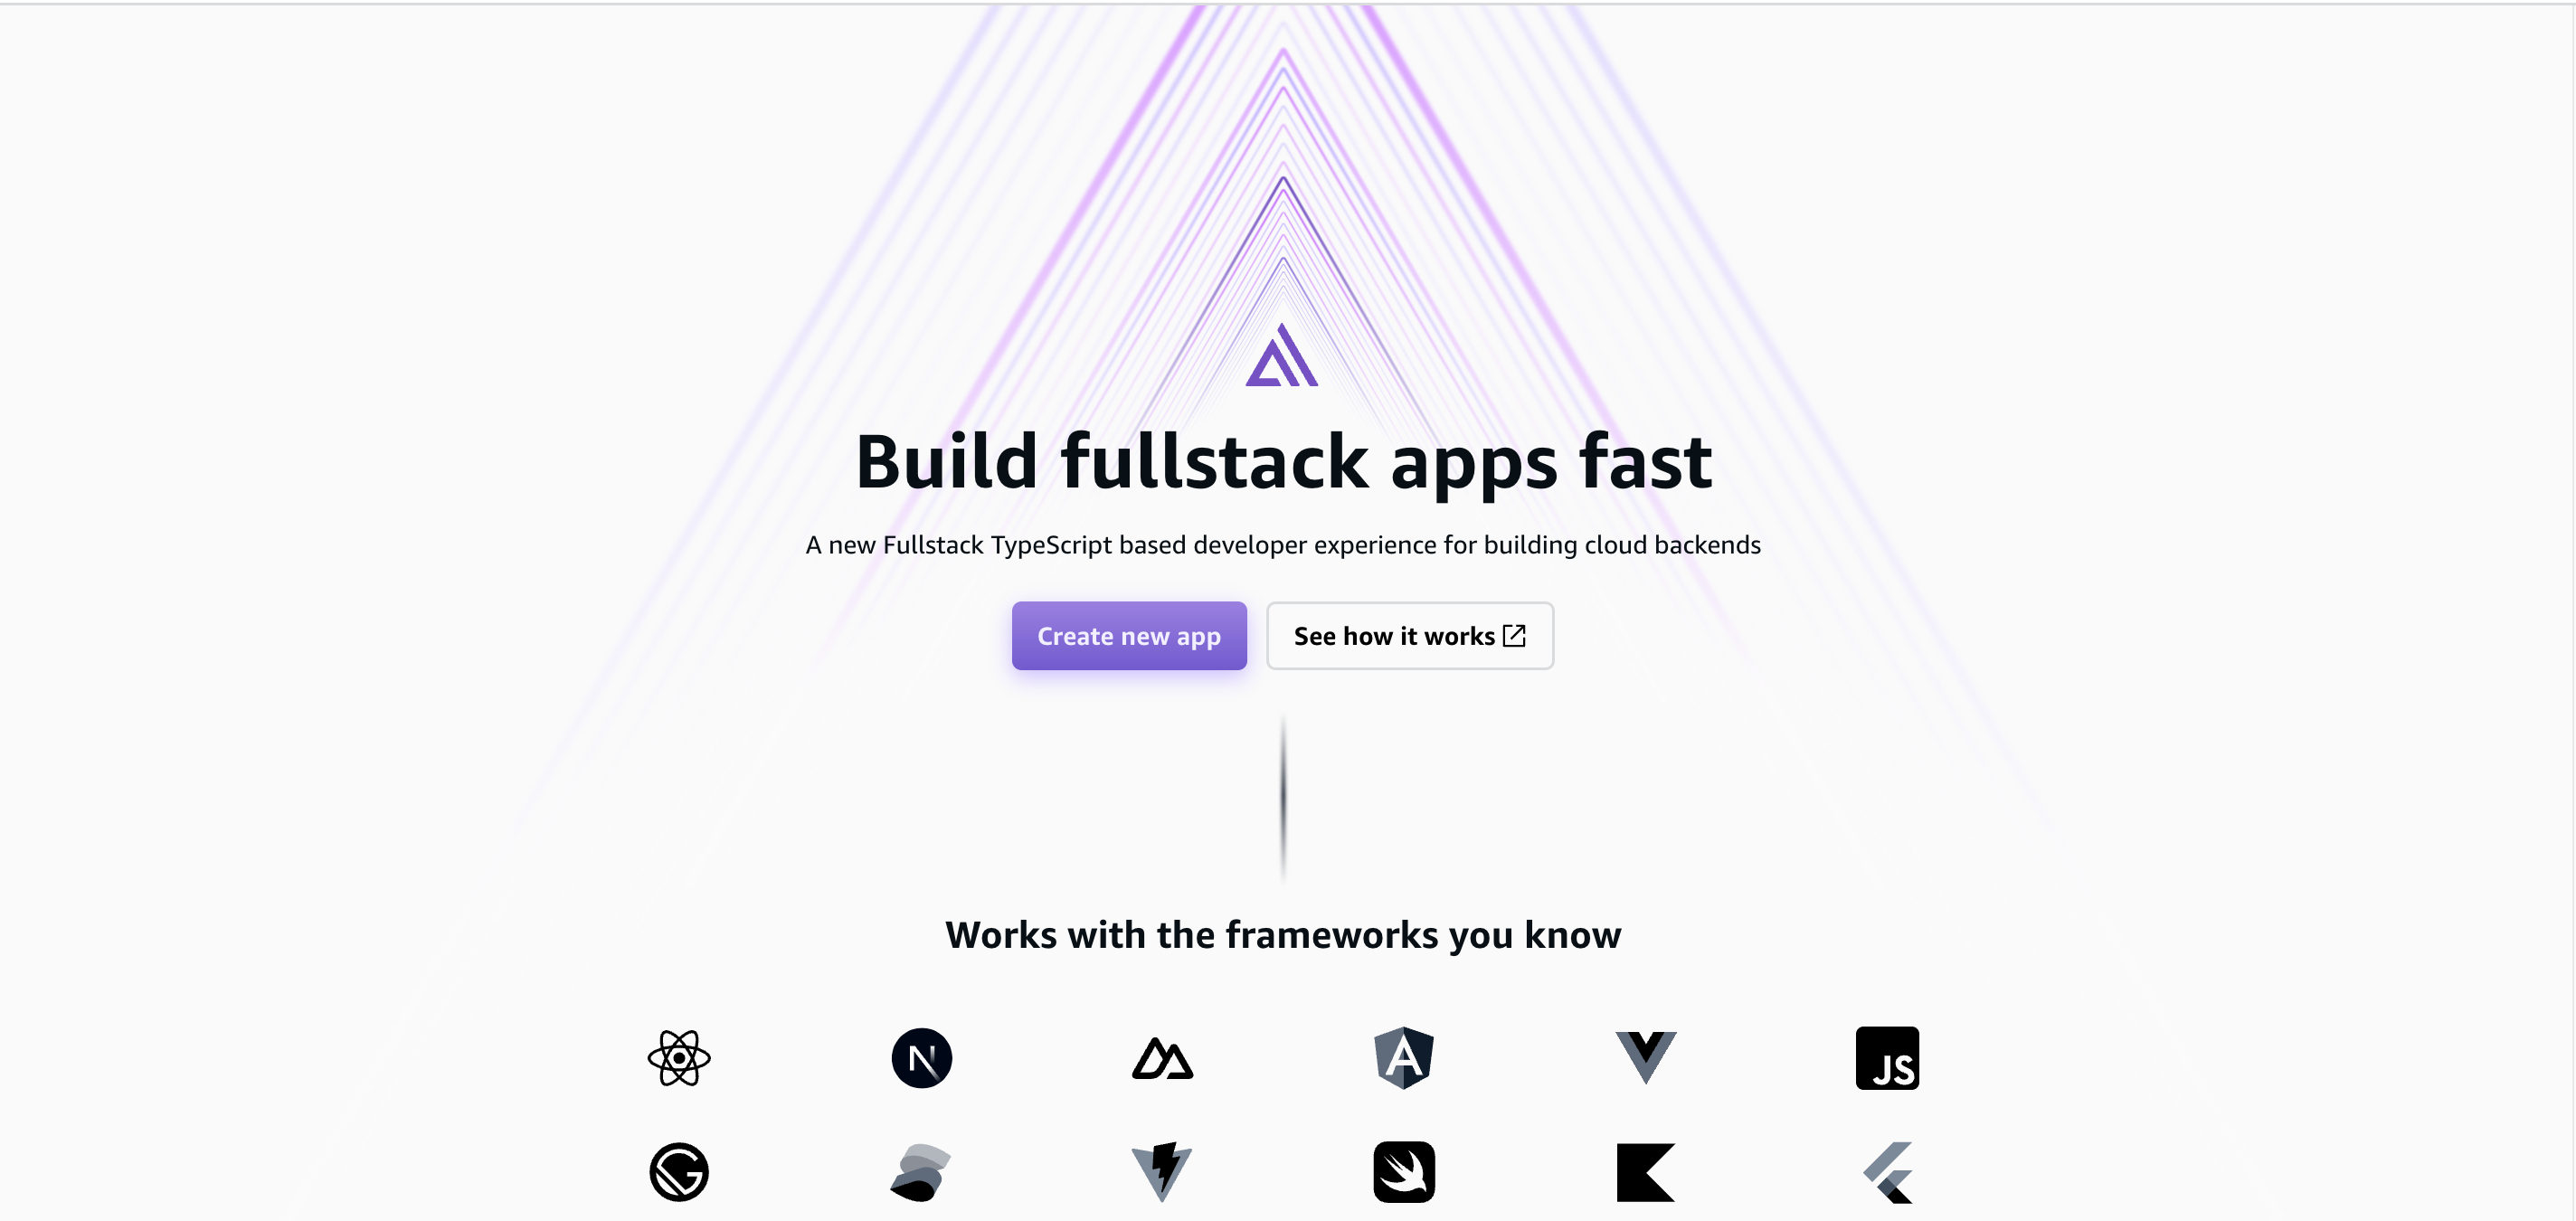
*Click on Create new app button as shown in the image
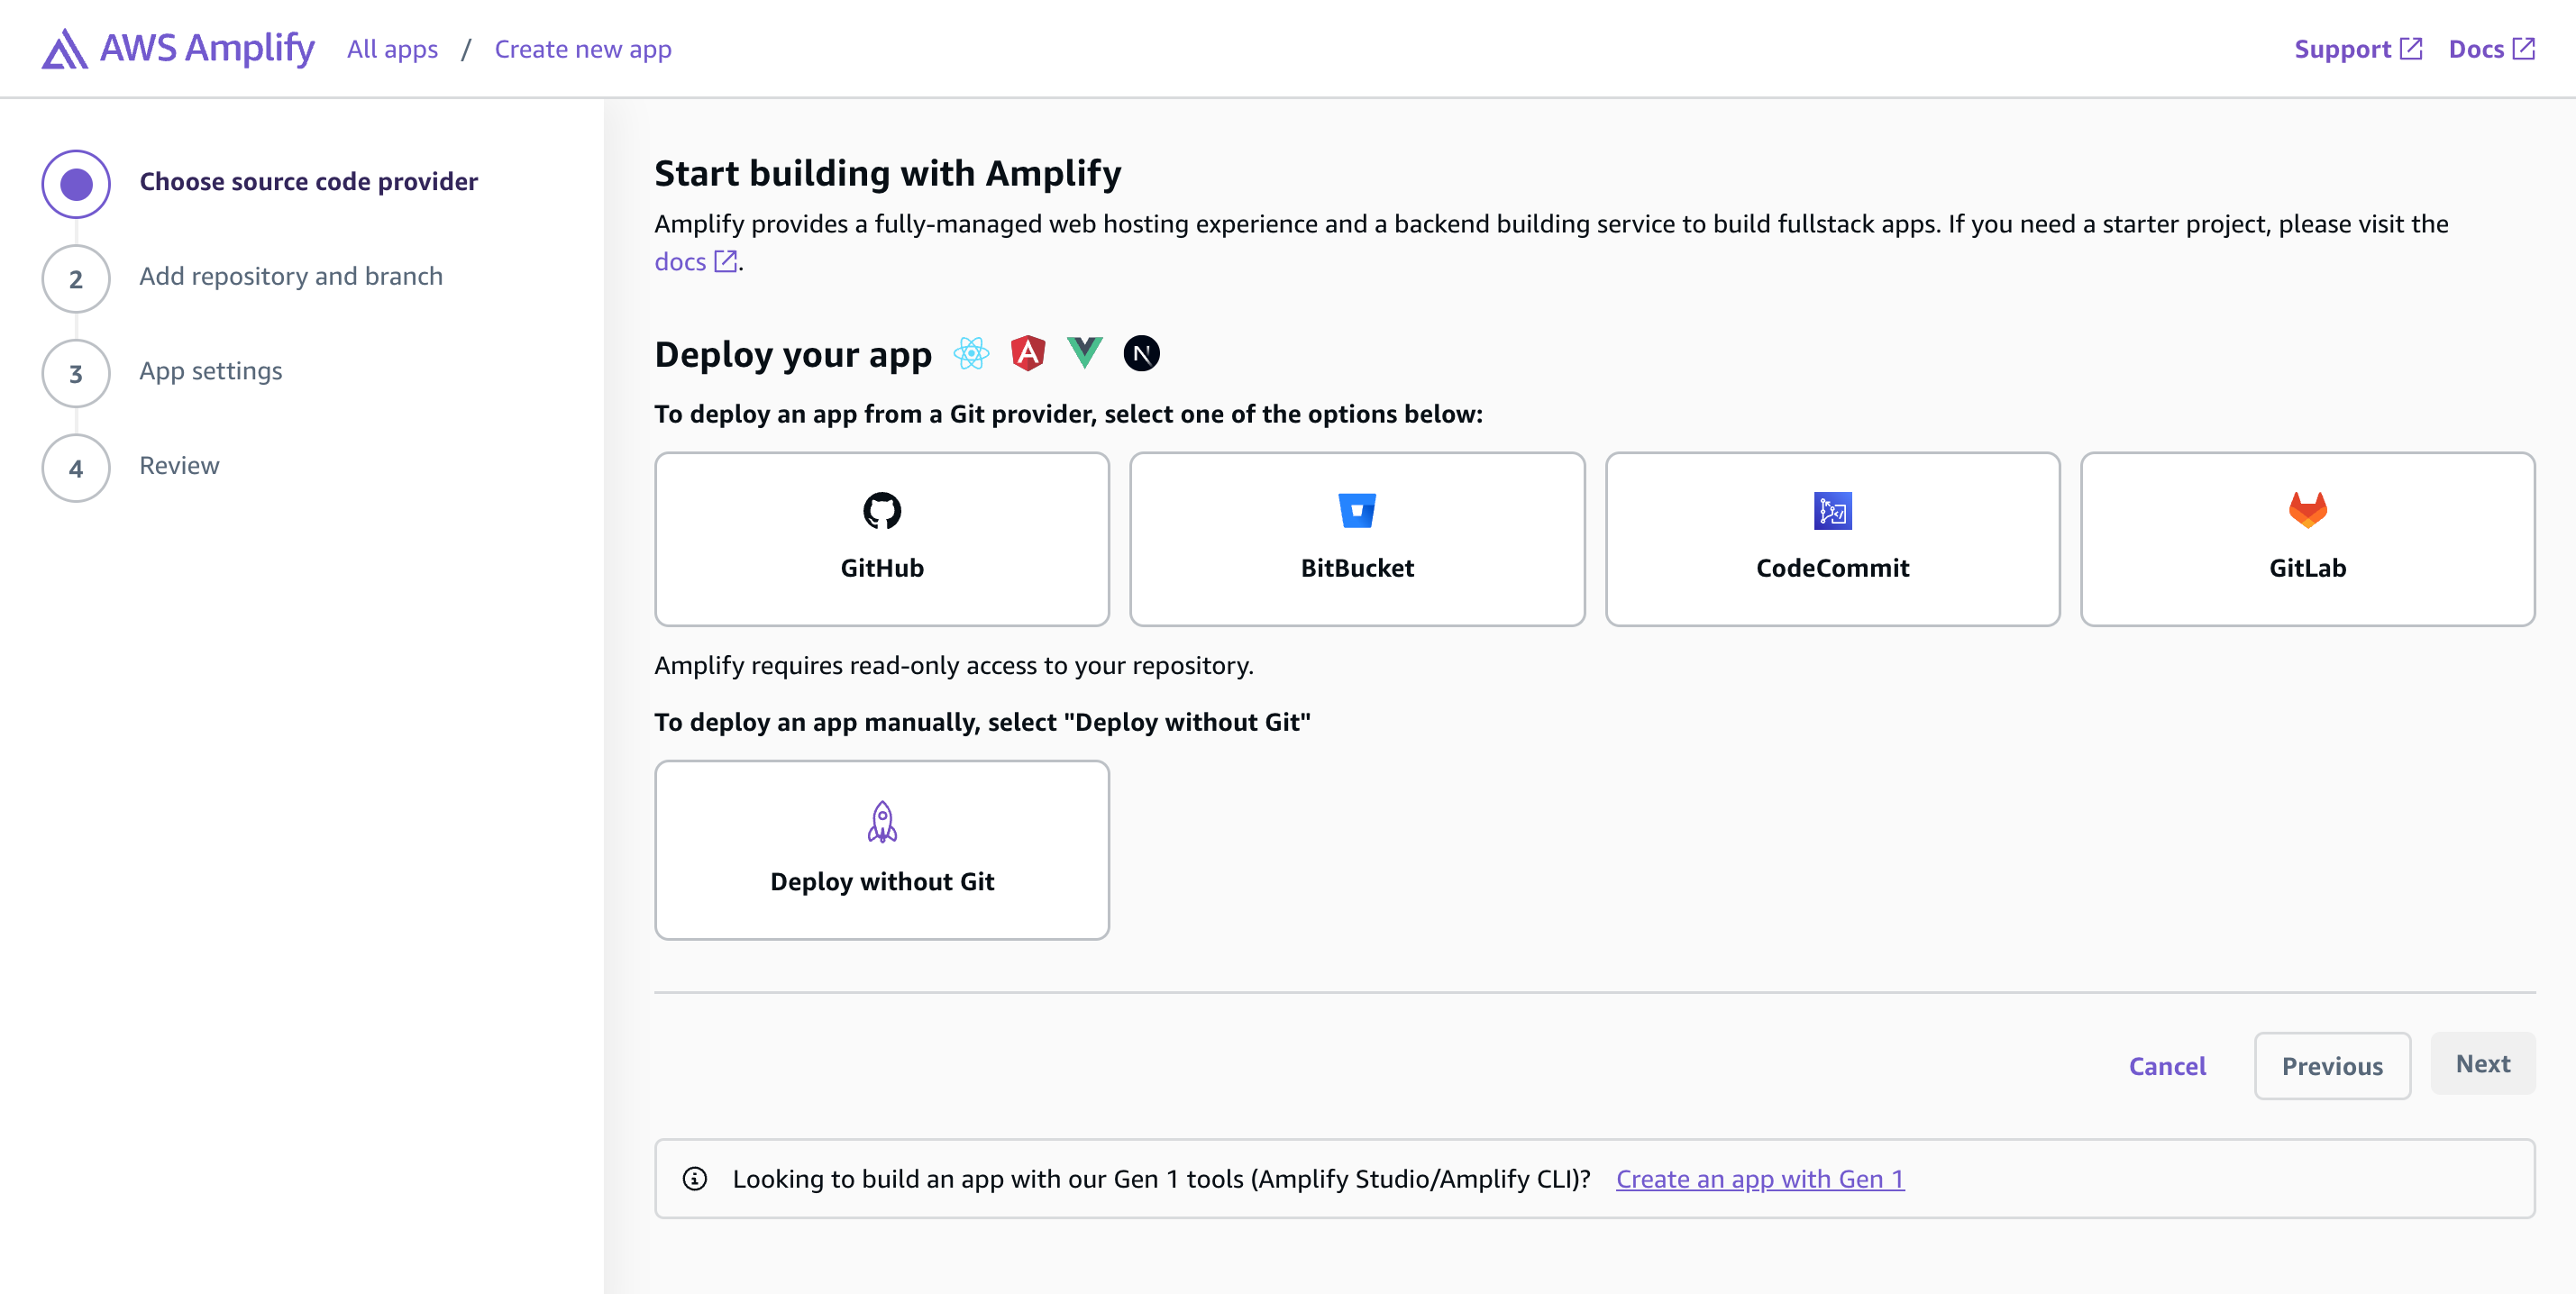
Step 2 : Select the method to deploy the code
You are redirected to this page. This screen displays a list of remote git repositories supported by git including github, gitlab, bitbucket and AWS codecommit along with another option to deploy without git(manually) as shown in image below.
Step 3 (Optional): Deploy without git:
If you wish to upload directly without using any git workflow, then first you need to build your react or next js app using
npm run build
or any other build command based on your framework. Then upload the static folder generated by your app to the screen as shown in the image below:
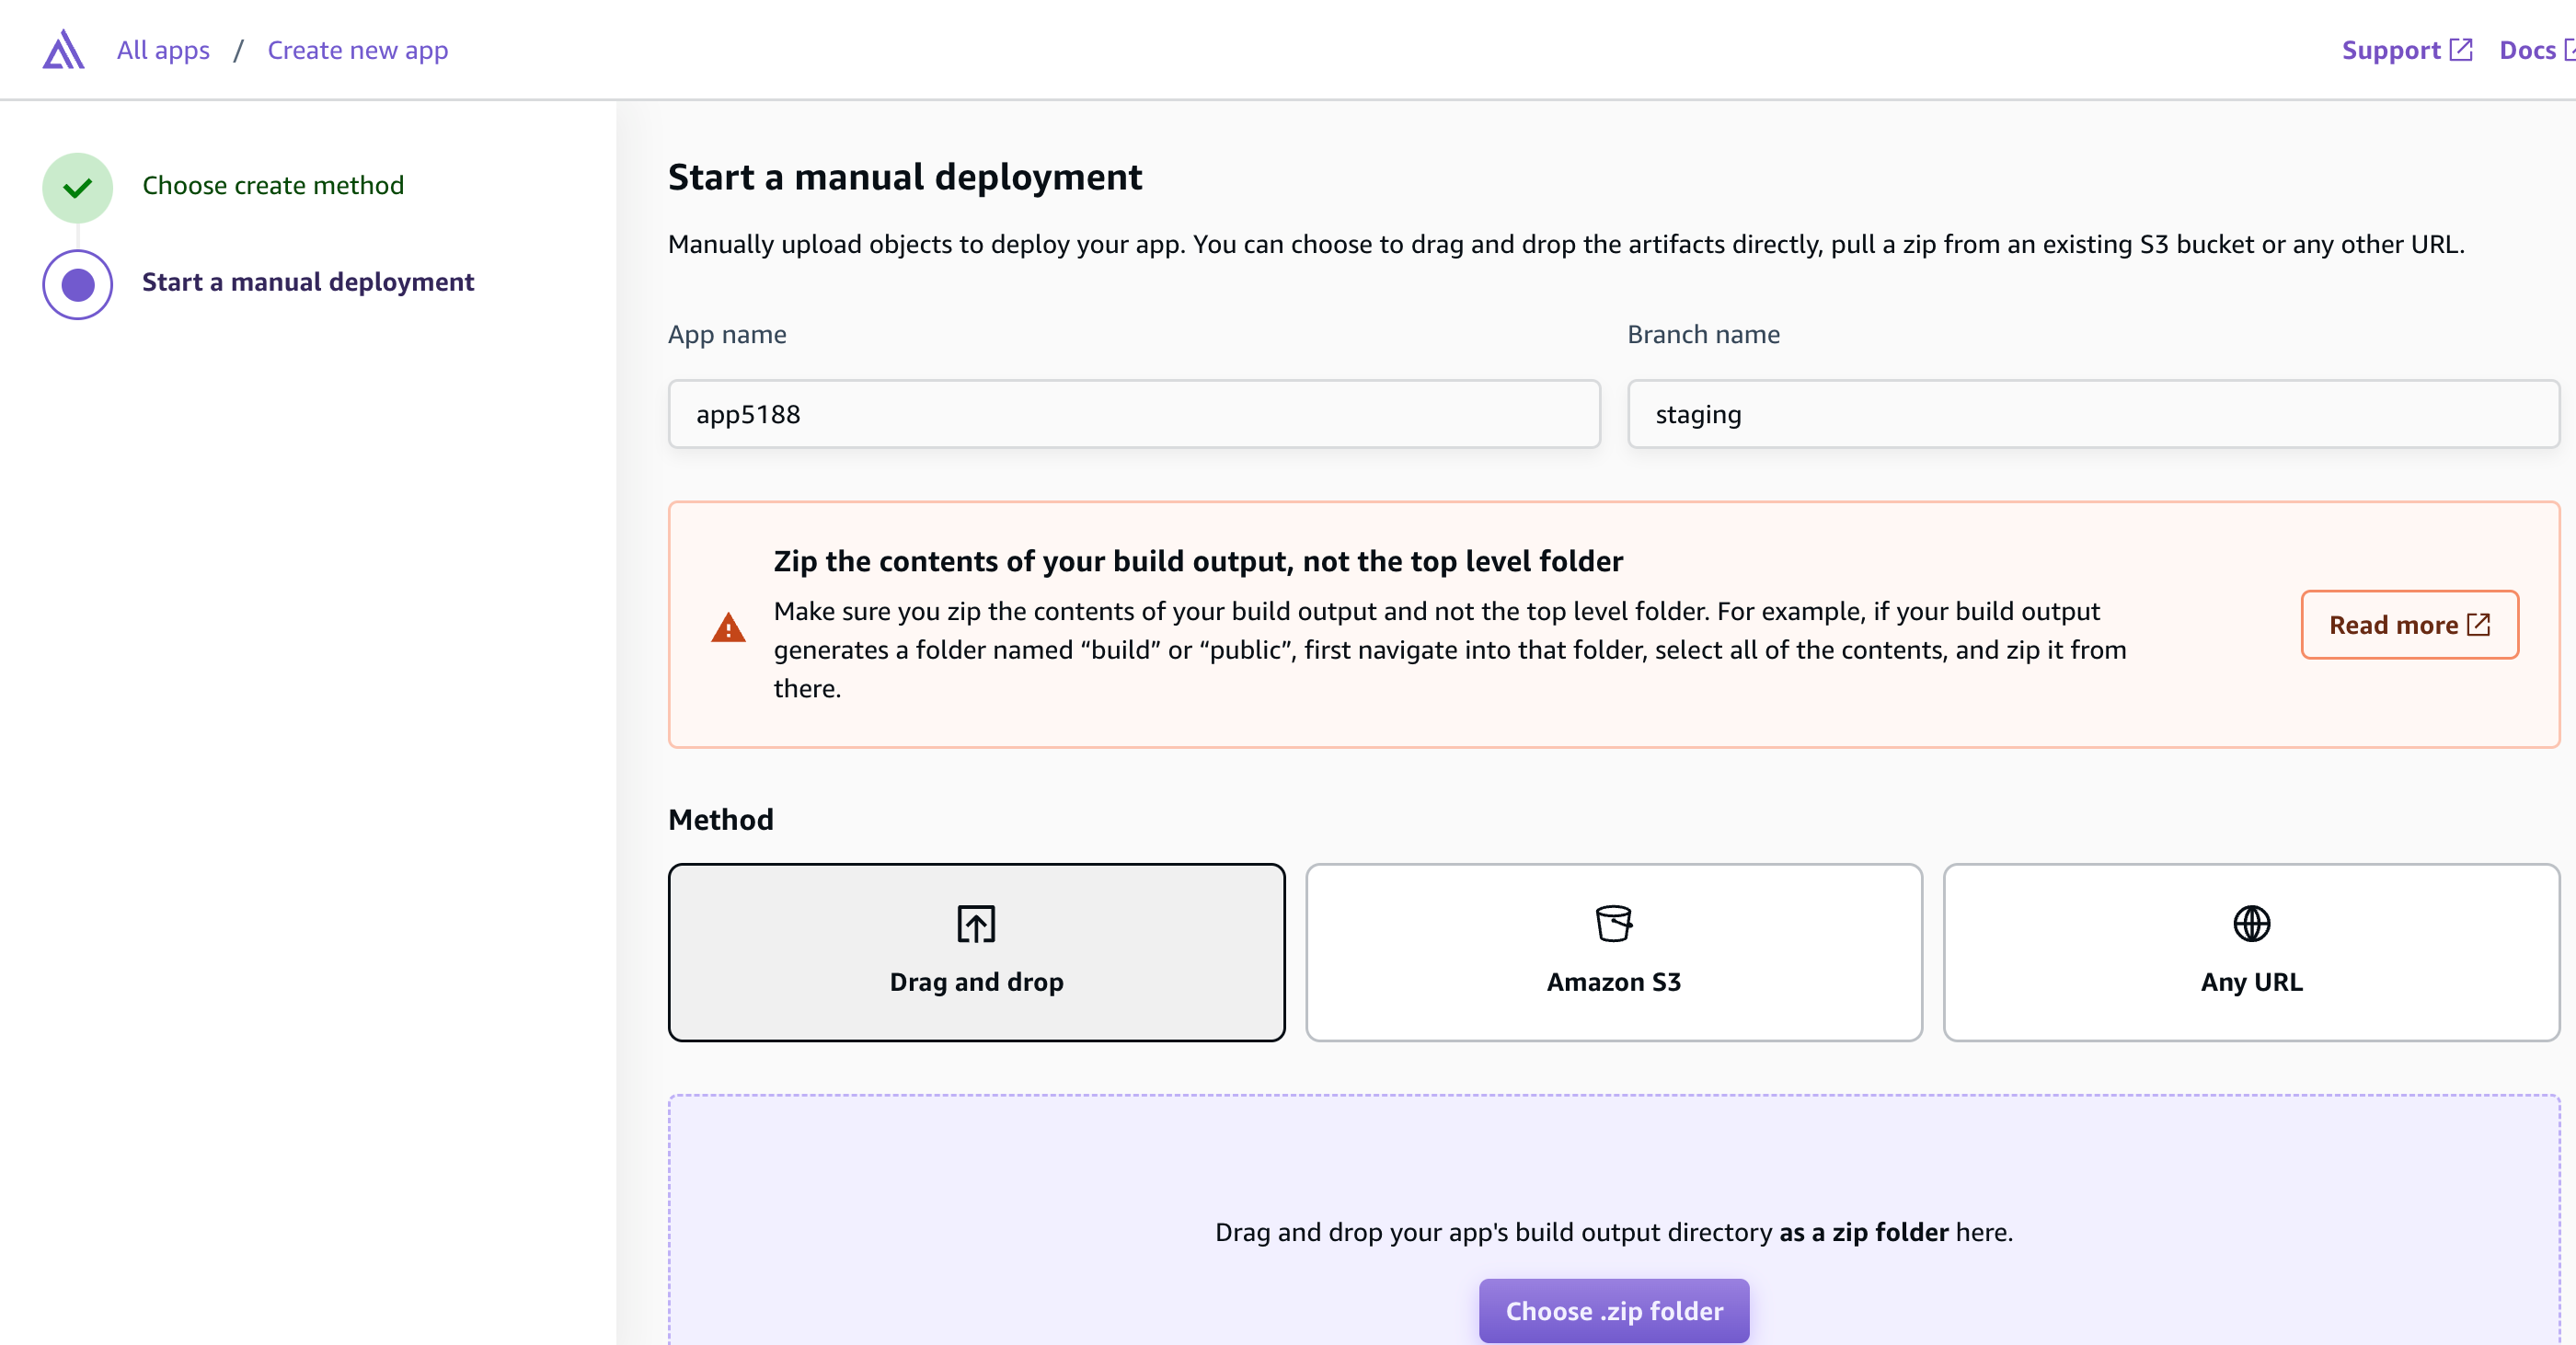
For React: The static folder name is build (generally non configurable). If you see this folder you can drag and drop the build folder, by compressing it to zip.
For Next js: The build folder for the next app is customizable, so you can check your folder name in file next.config.js in root of your project file:
module.exports = {
                     distDir: 'build',
                 };
* The value of distDir i.e. build is the directory name of static files generated in the same folder as the name. It means that when you run the command npm run build , the static files are generated in this folder. This folder is then zipped and uploaded to aws amplify. It may differ by configuration.
Additionally , As you can see in the above image, you can upload the static build files in three different ways: 1. Directly upload Zip as discussed above , 2. Use Amazon S3 or 3. any URL that you can download the content from.
If you chose to deploy manually you can skip steps below this and move directly to step 8.
Step 4: Authorize git vendor
You can use any of above mentioned remote git vendors to deploy your app to Amplify using git : When you select the choice of your remote git vendor and click next , you will get a prompt to authorize the specific app i.e. github , gitlab or any other vendors. Enter username and password and complete the authentication process.
Step 5: Choose Repository and Branch of your project
Once the authorization process is completed, you will see following screen where you can choose your repository or branch.
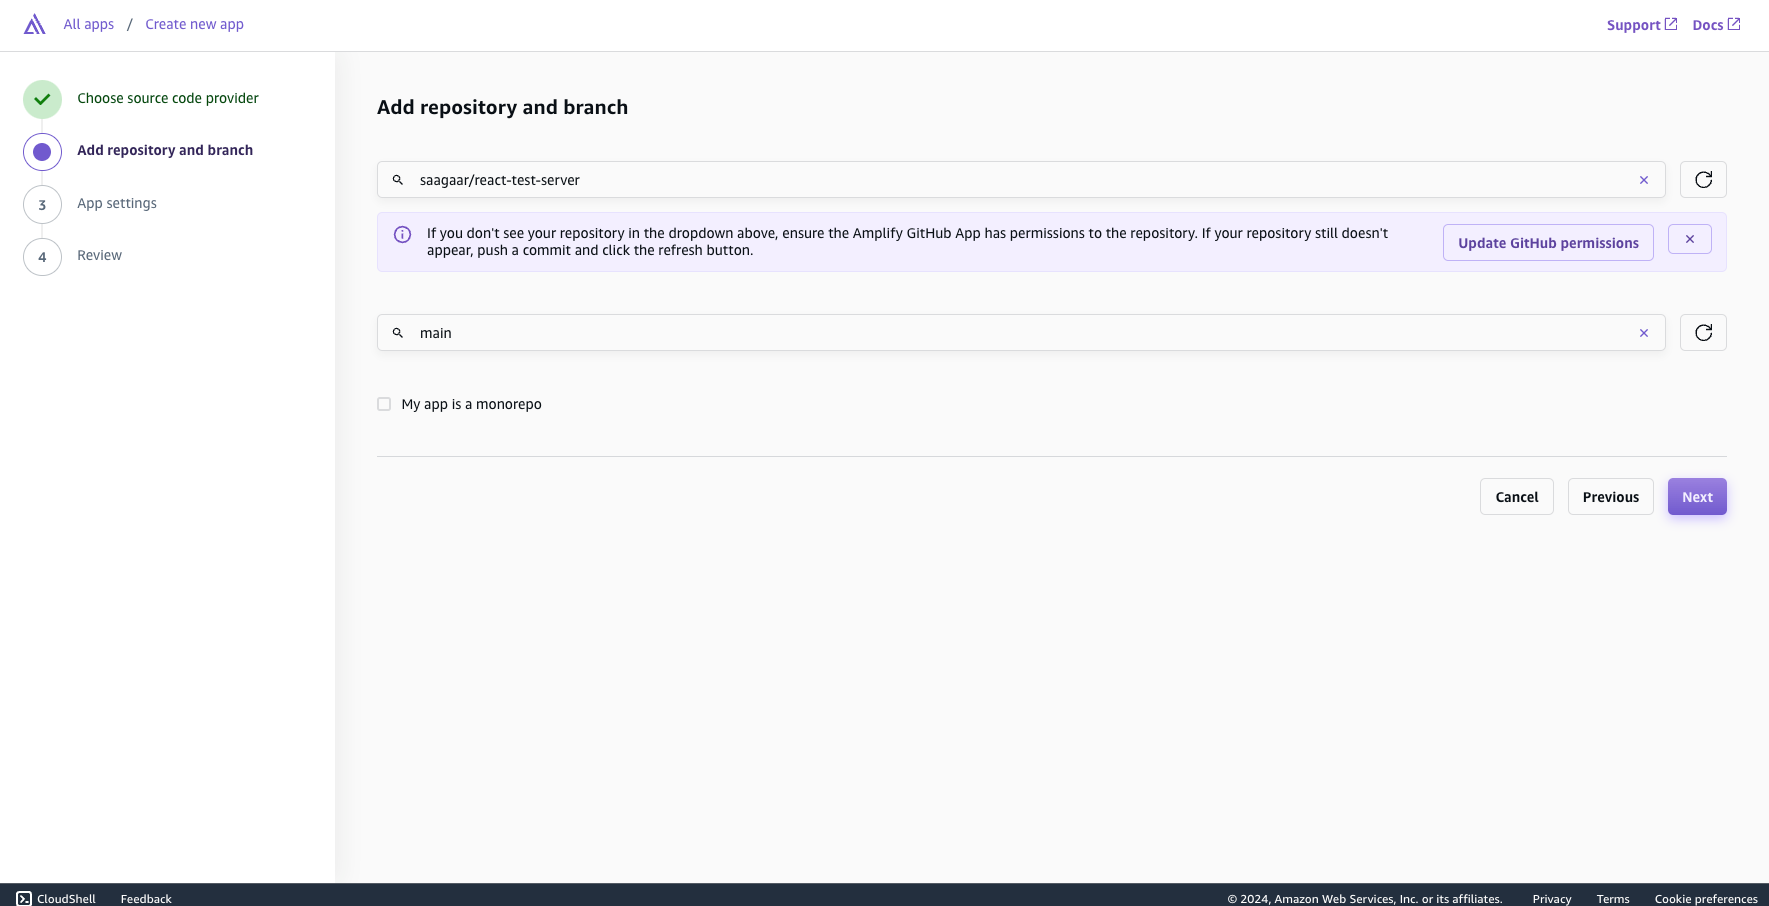
This screen shows options to view and search for all the repositories and their corresponding branches that are associated with this account, you can search on repository and then select one of the branches associated with the selected repo that you wish to use for production. Then click button Next
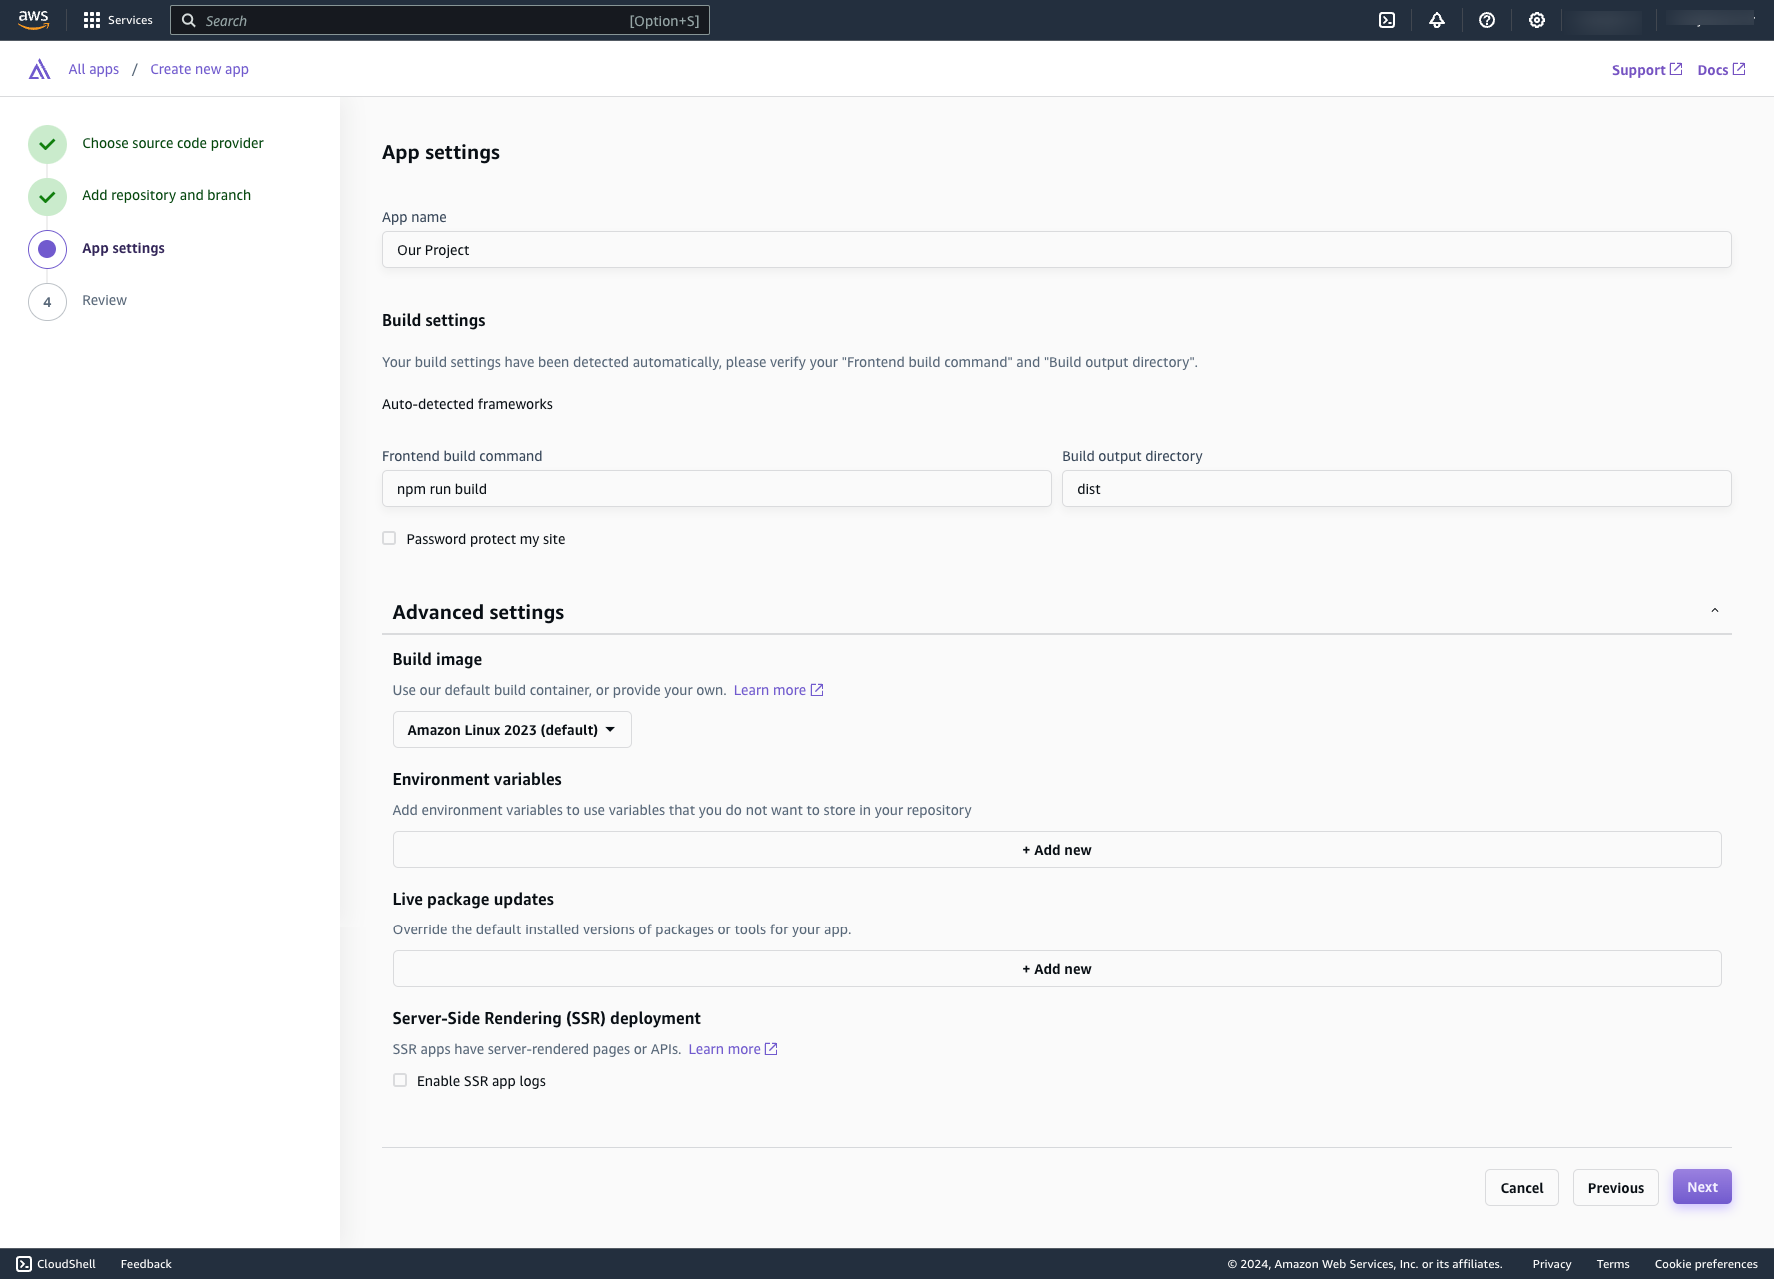
Step 6: Configure settings
You can change following settings :
-
App name
-
Build command for your app (Based on your app that you are deploying) i.e. npm run build in case of react
-
Output directory (any folder of your choice)
-
Environment variables (if any). You can add key value pair of .env files
-
Override any packages you need from your installed versions
-
In case of Next js (app with SSR options ),Enable SSR app logs checkbox can be checked
Then click on Next button as shown in image below:
Step 7: Review the settings
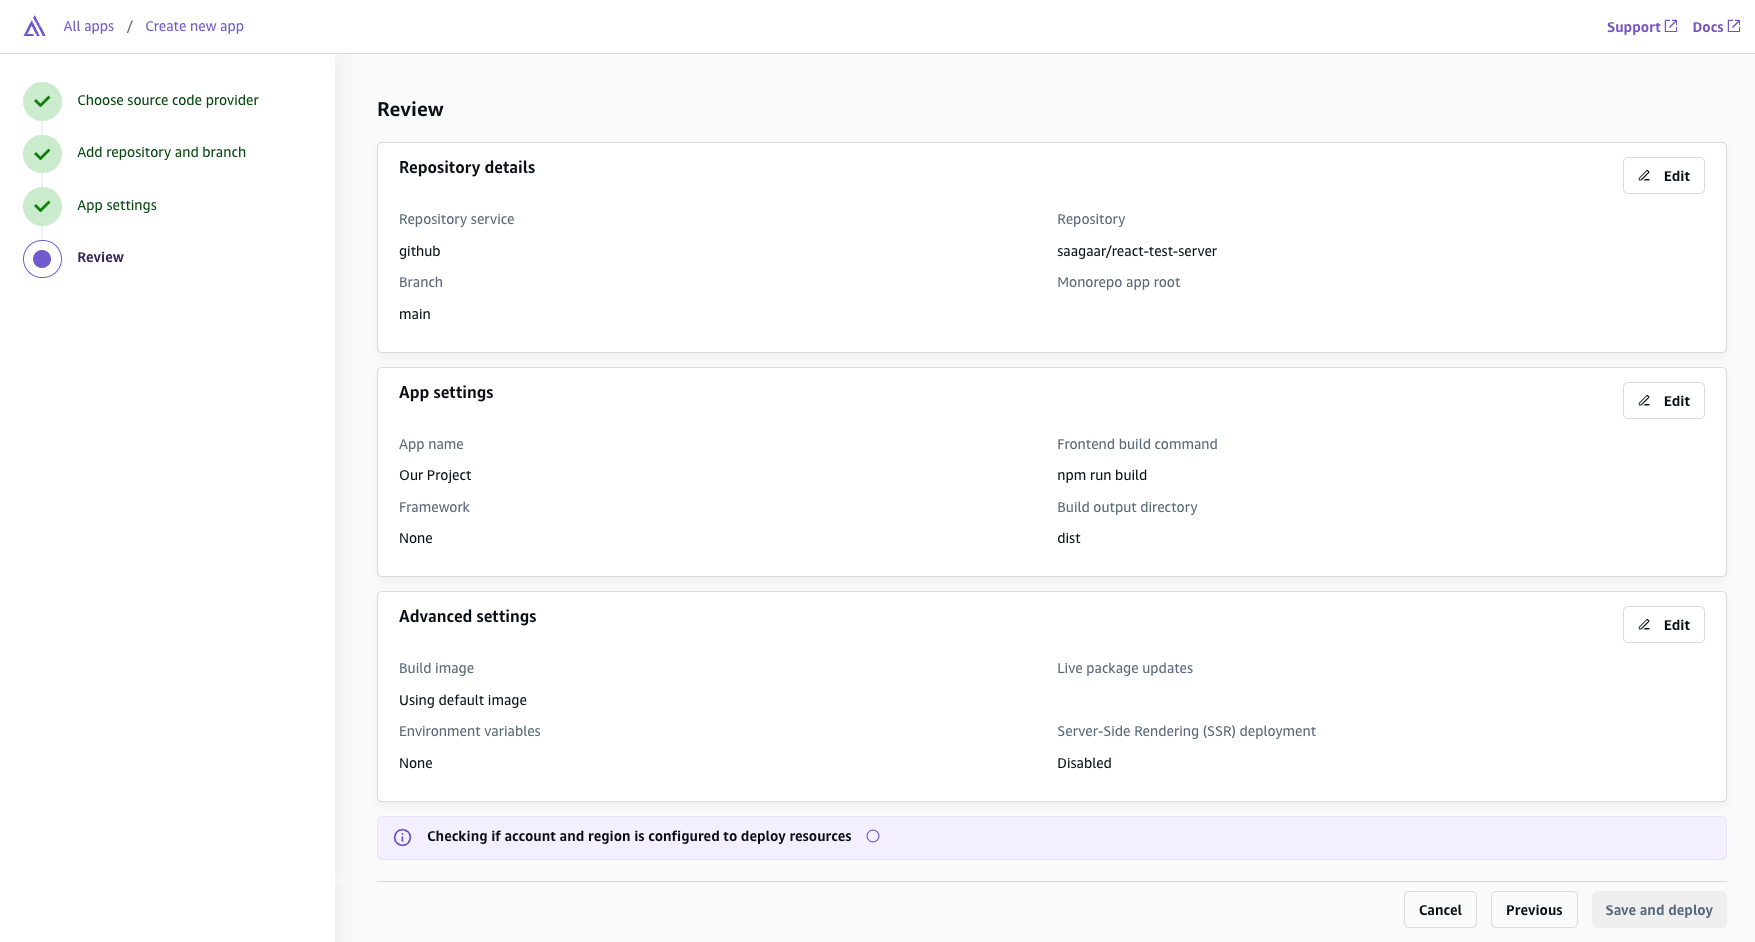
You can review any settings changed in above steps, you can change repository details, app settings details like .env file, build options and so on and other advanced settings that we updated in earlier step and click save and deploy button.
Step 8 : Deployment progressing and completion :
When the button for deployment is submitted, In this step your deployment process starts and completes, in this step the build command is run and all folders are built dynamically (incase of git upload ) and the env file is set up if anything is updated. Once deployment is completed you will see screen something like this:
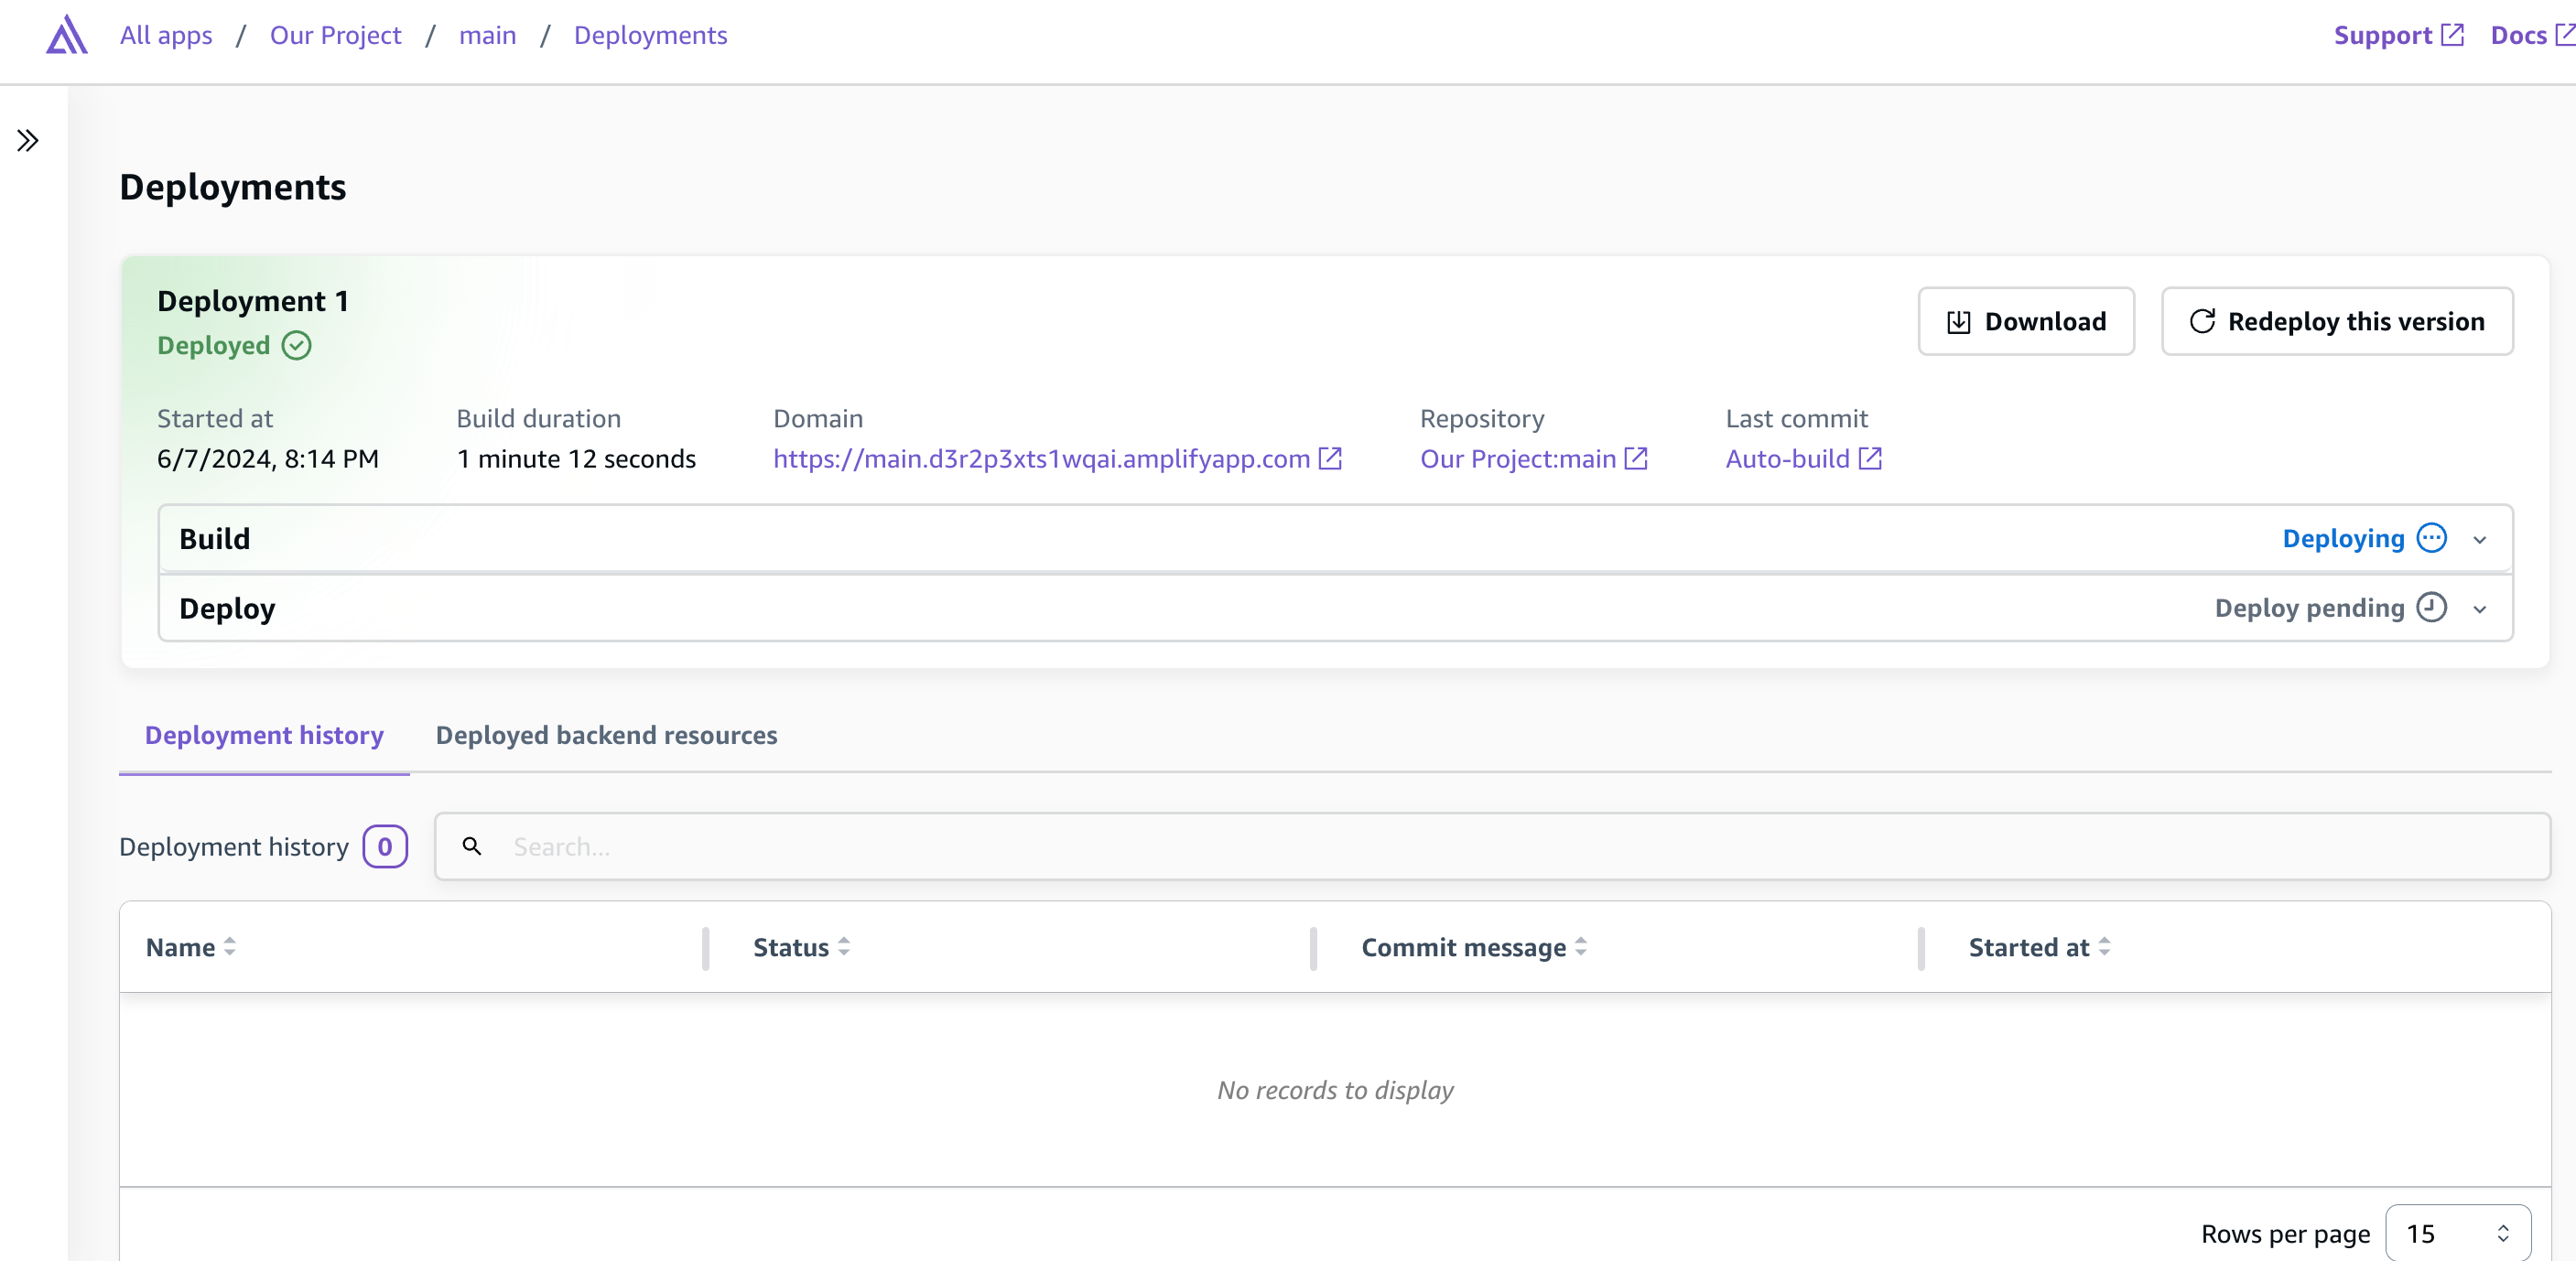
Once Deployment is completed , you can use the url under the title Domain to preview the installed project. You can see the deployed content like this one in my case.
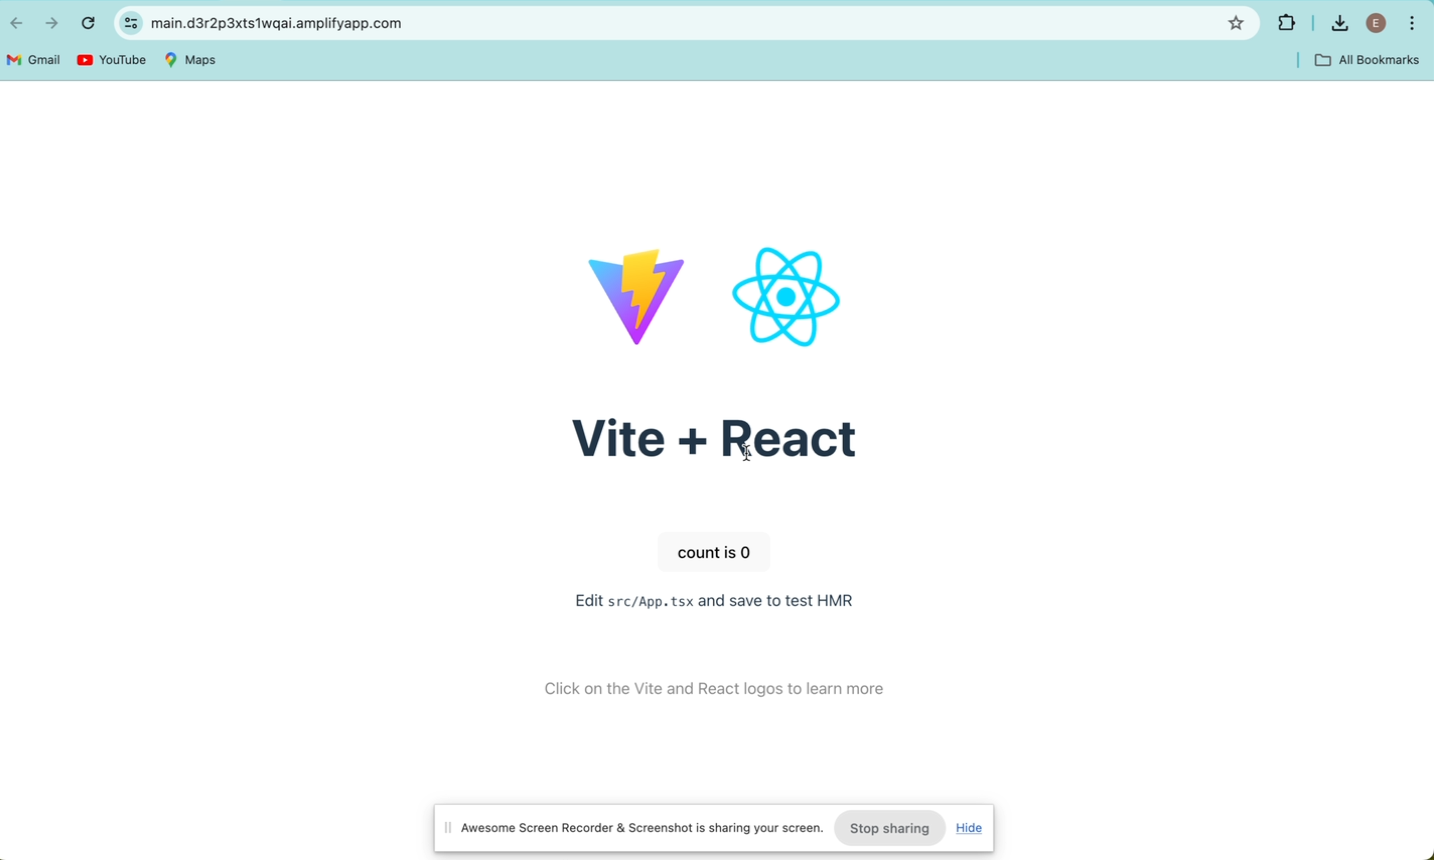
Now beyond this point , If you are looking to set up a custom domain ,then you can follow this blog further, if you are using it only for internal use and do not want a custom domain to be connected to this app, you can exit from here. You can use the domain as shown in previous image when you need to see the app running.
Adding a custom Domain
To add a custom domain, You can visit search route 53 > hosted zone > create hosted zone in your AWS console. It will open up a page as shown in image below:
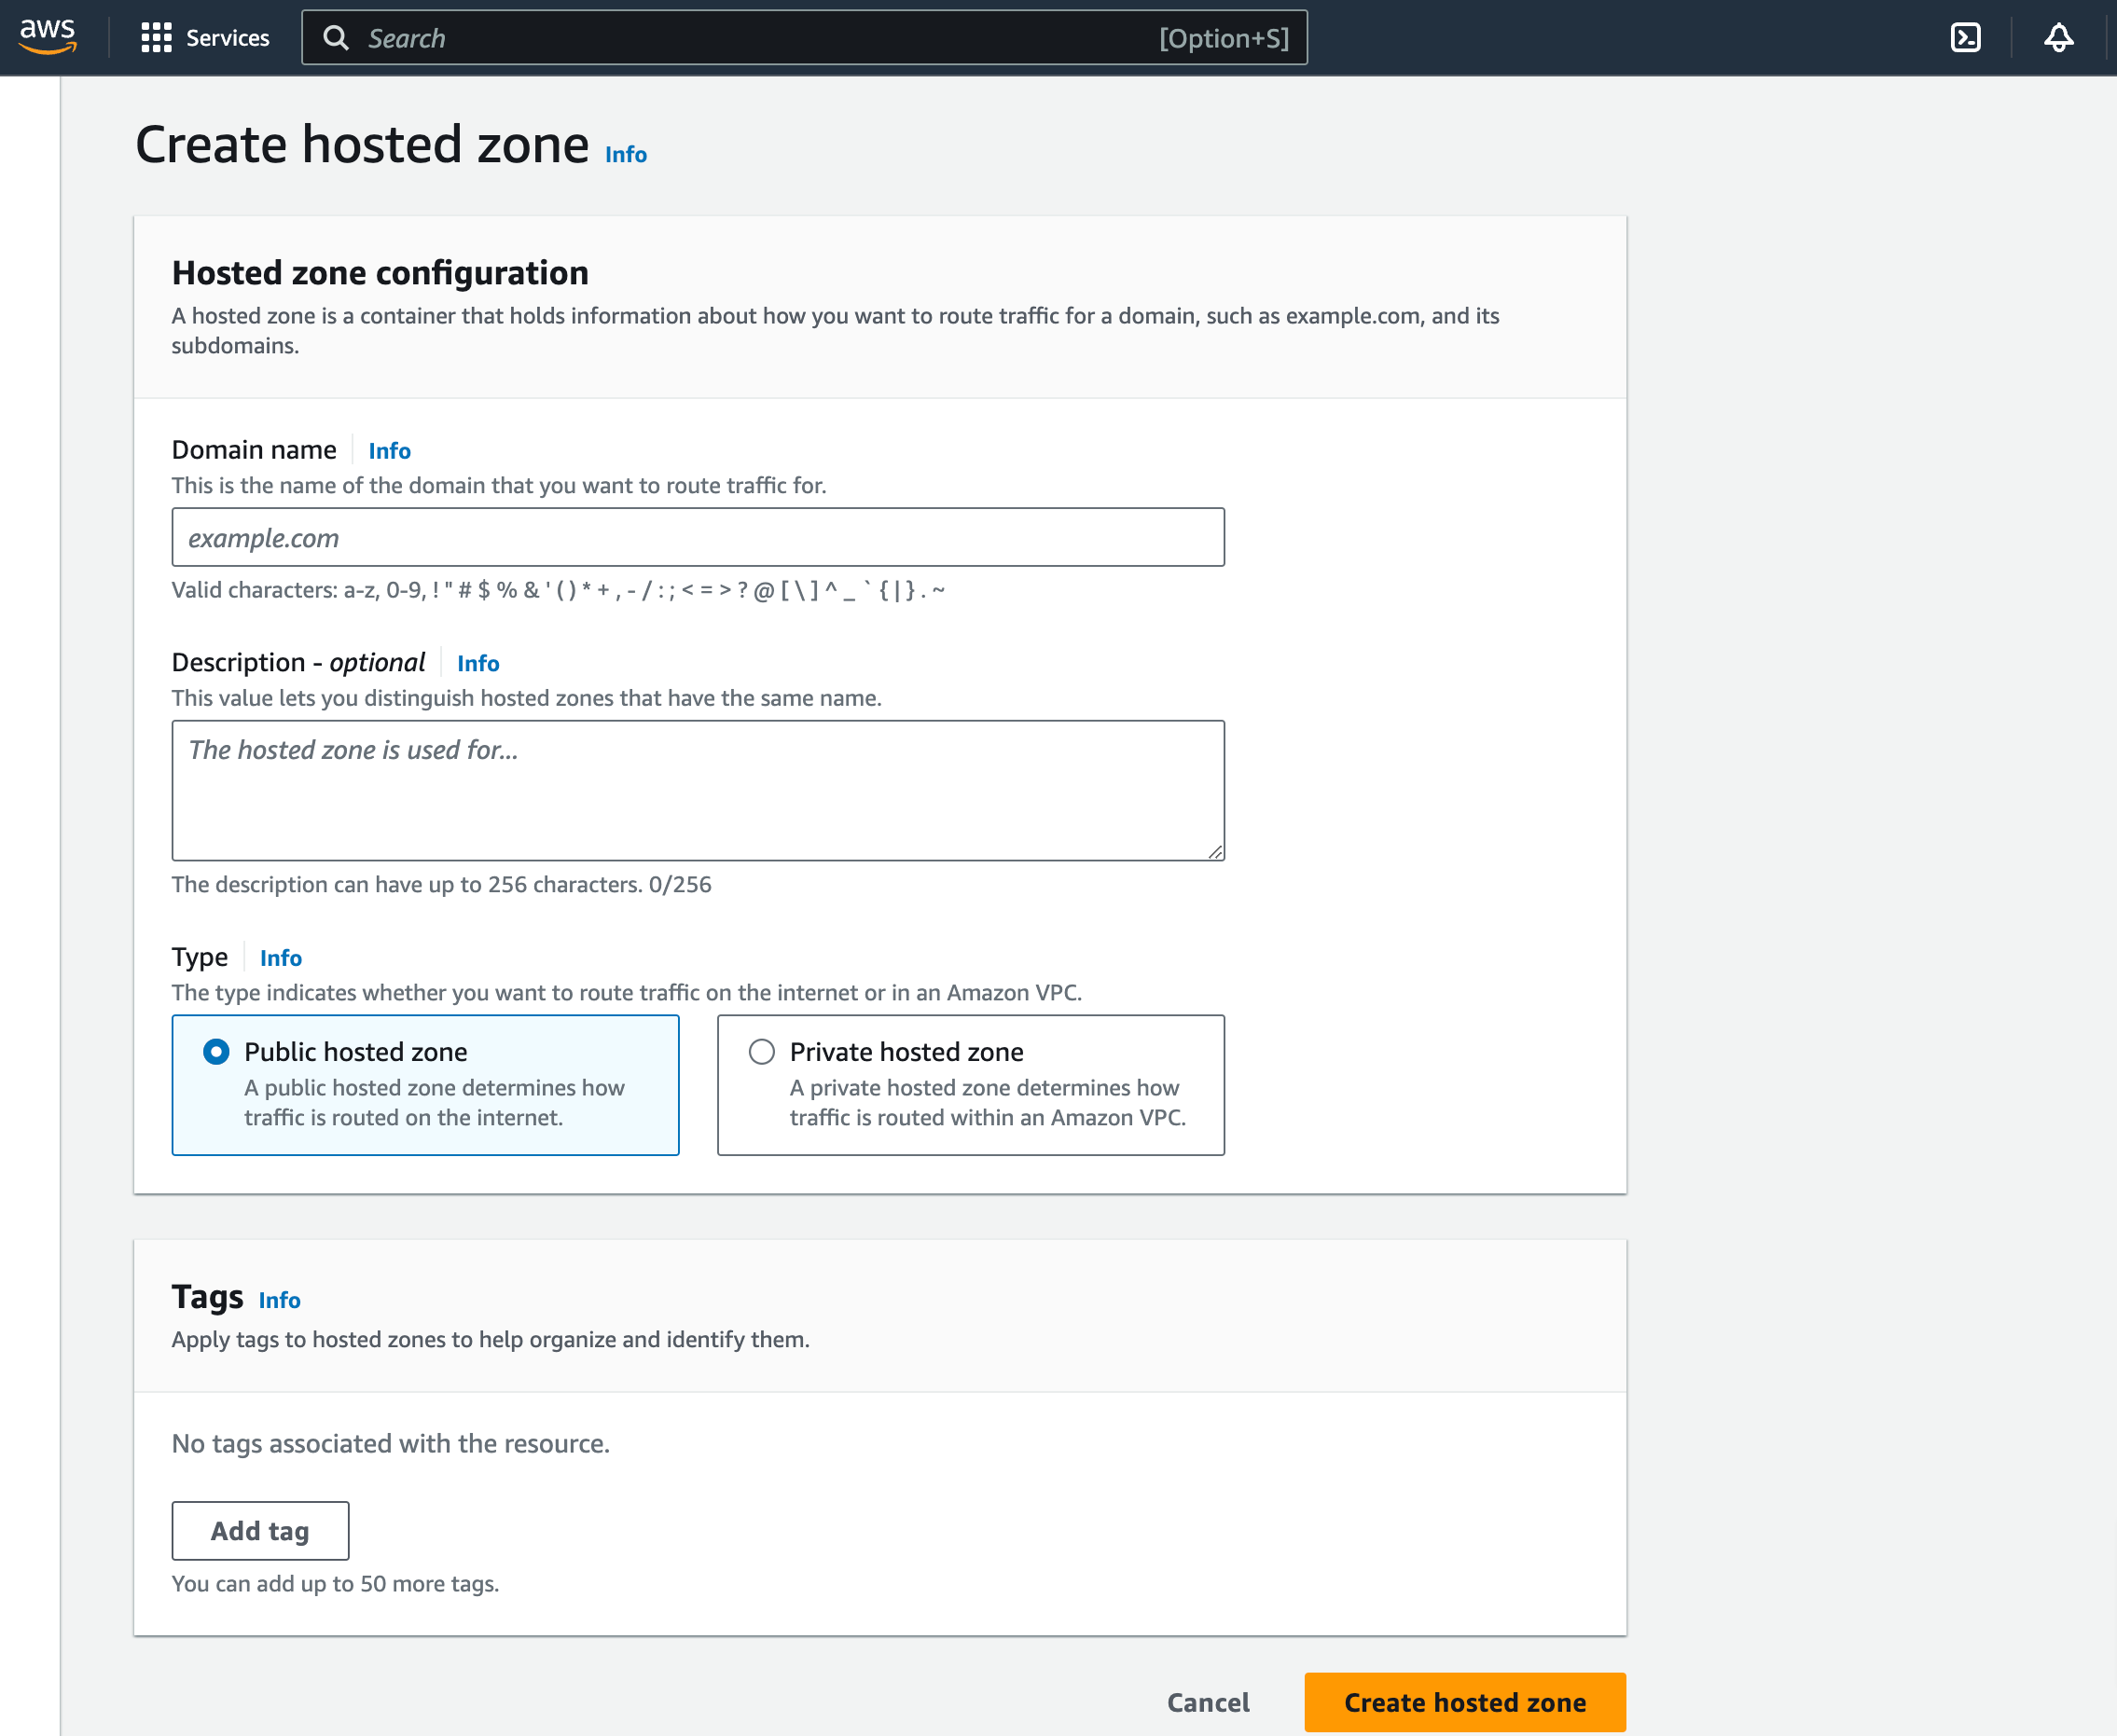
The domain name field is the domain name you already have bought. You can add your domain name. The description is just for you to know, Type is if public if you want it over internet.
You can create a hosted zone for your domain. Once, you create a hosted zone you will get two records NS and SOA as shown in the figure below:
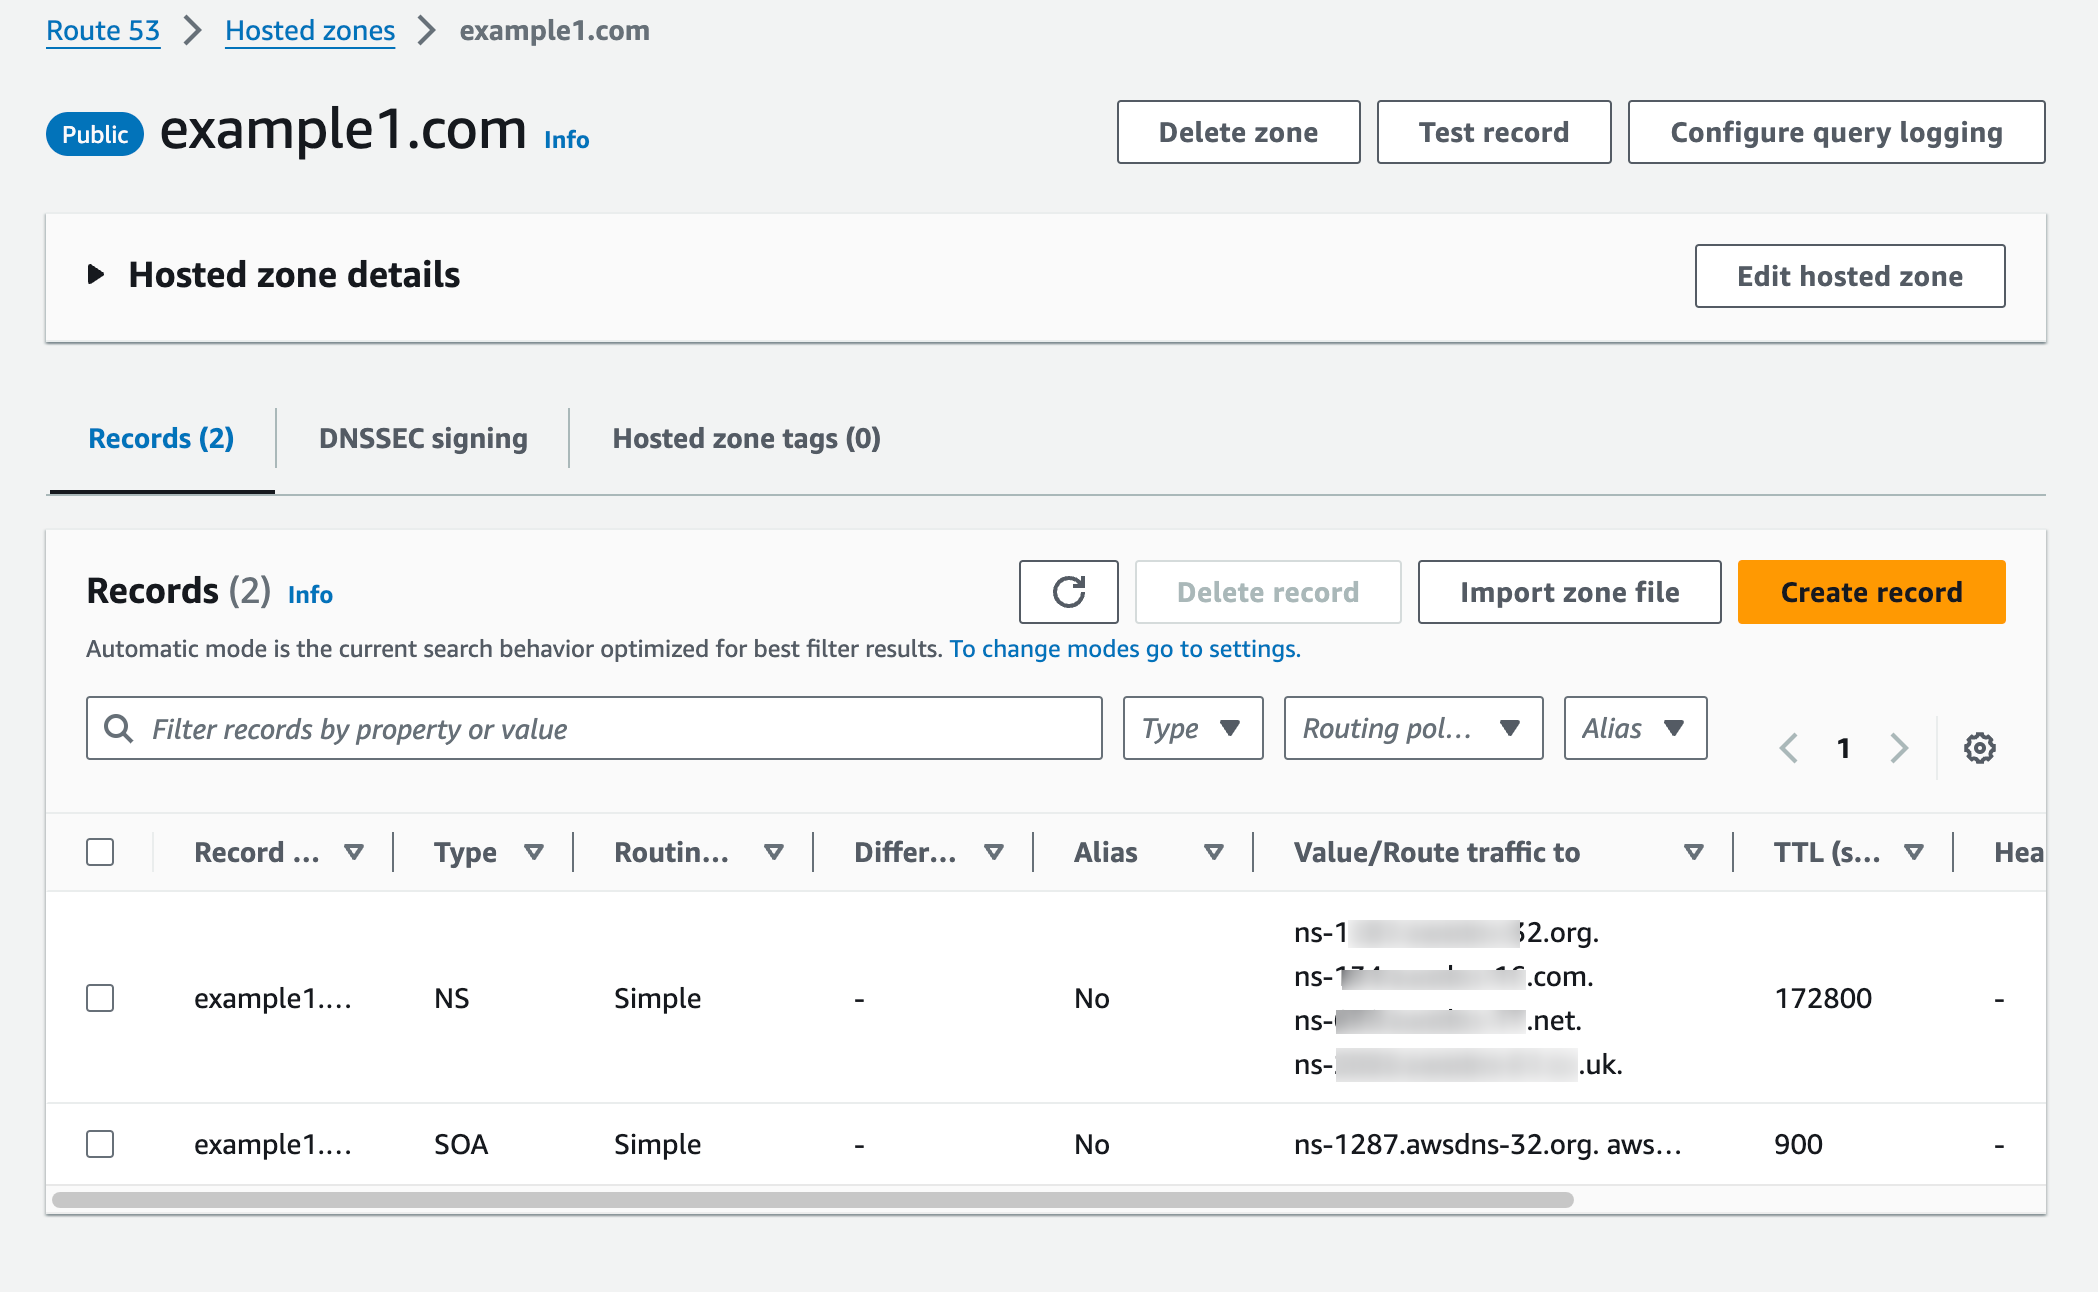
Now, In your domain hosting provider account, from which you bought the domain, you can update your Name server, the name server is the Value/Route traffic to the column in the above table with Type NS as shown in image with table list above.
Once you update your Name Server to your domain service, then all requests are forwarded to AWS cloud but yet, domain does not open up your recently deployed app.
Now you need to forward this Nameserver request to amplify app: for this you need to configure in Amplify service:
Now the last step is to open up your amplify service in the console and open up the app that you deployed from above steps. Now, you can see a menu named Hosting. Go to the menu as shown in image below:
Go to Hosting > custom domains >Add domain
You will get a page as shown in the image below . when click on search options , you will get all list of domains added in hosted zones in Route 53 of your aws account. Now, select the desired domain and click on configure domain.
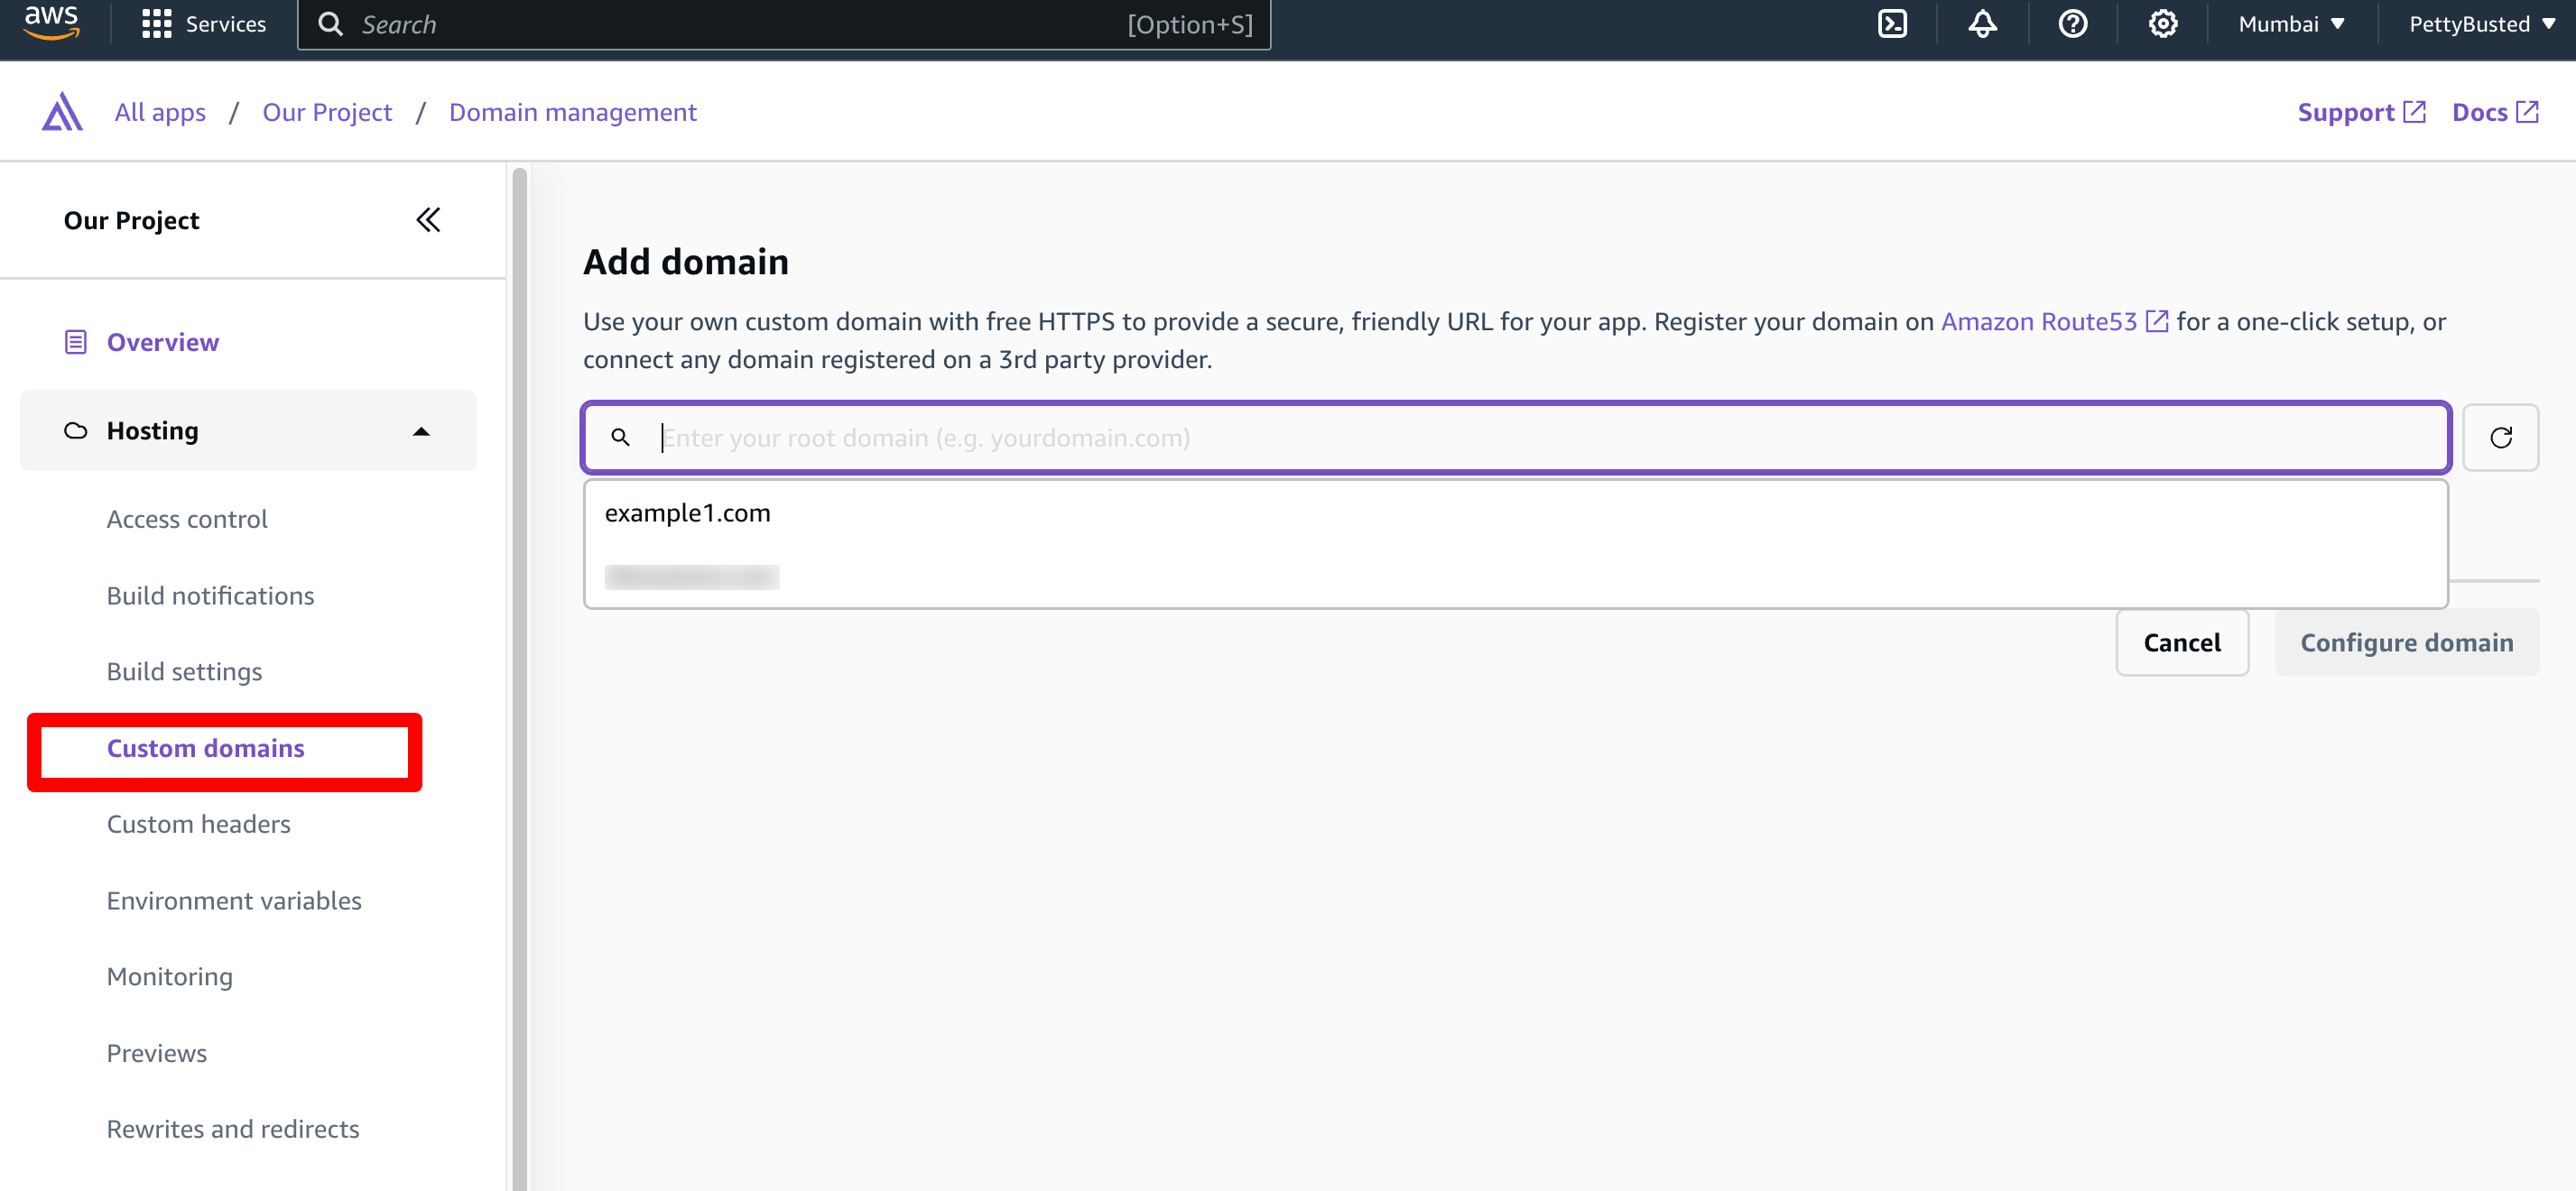
When you click button configure domain as shown in above image, you will get to a page that looks :
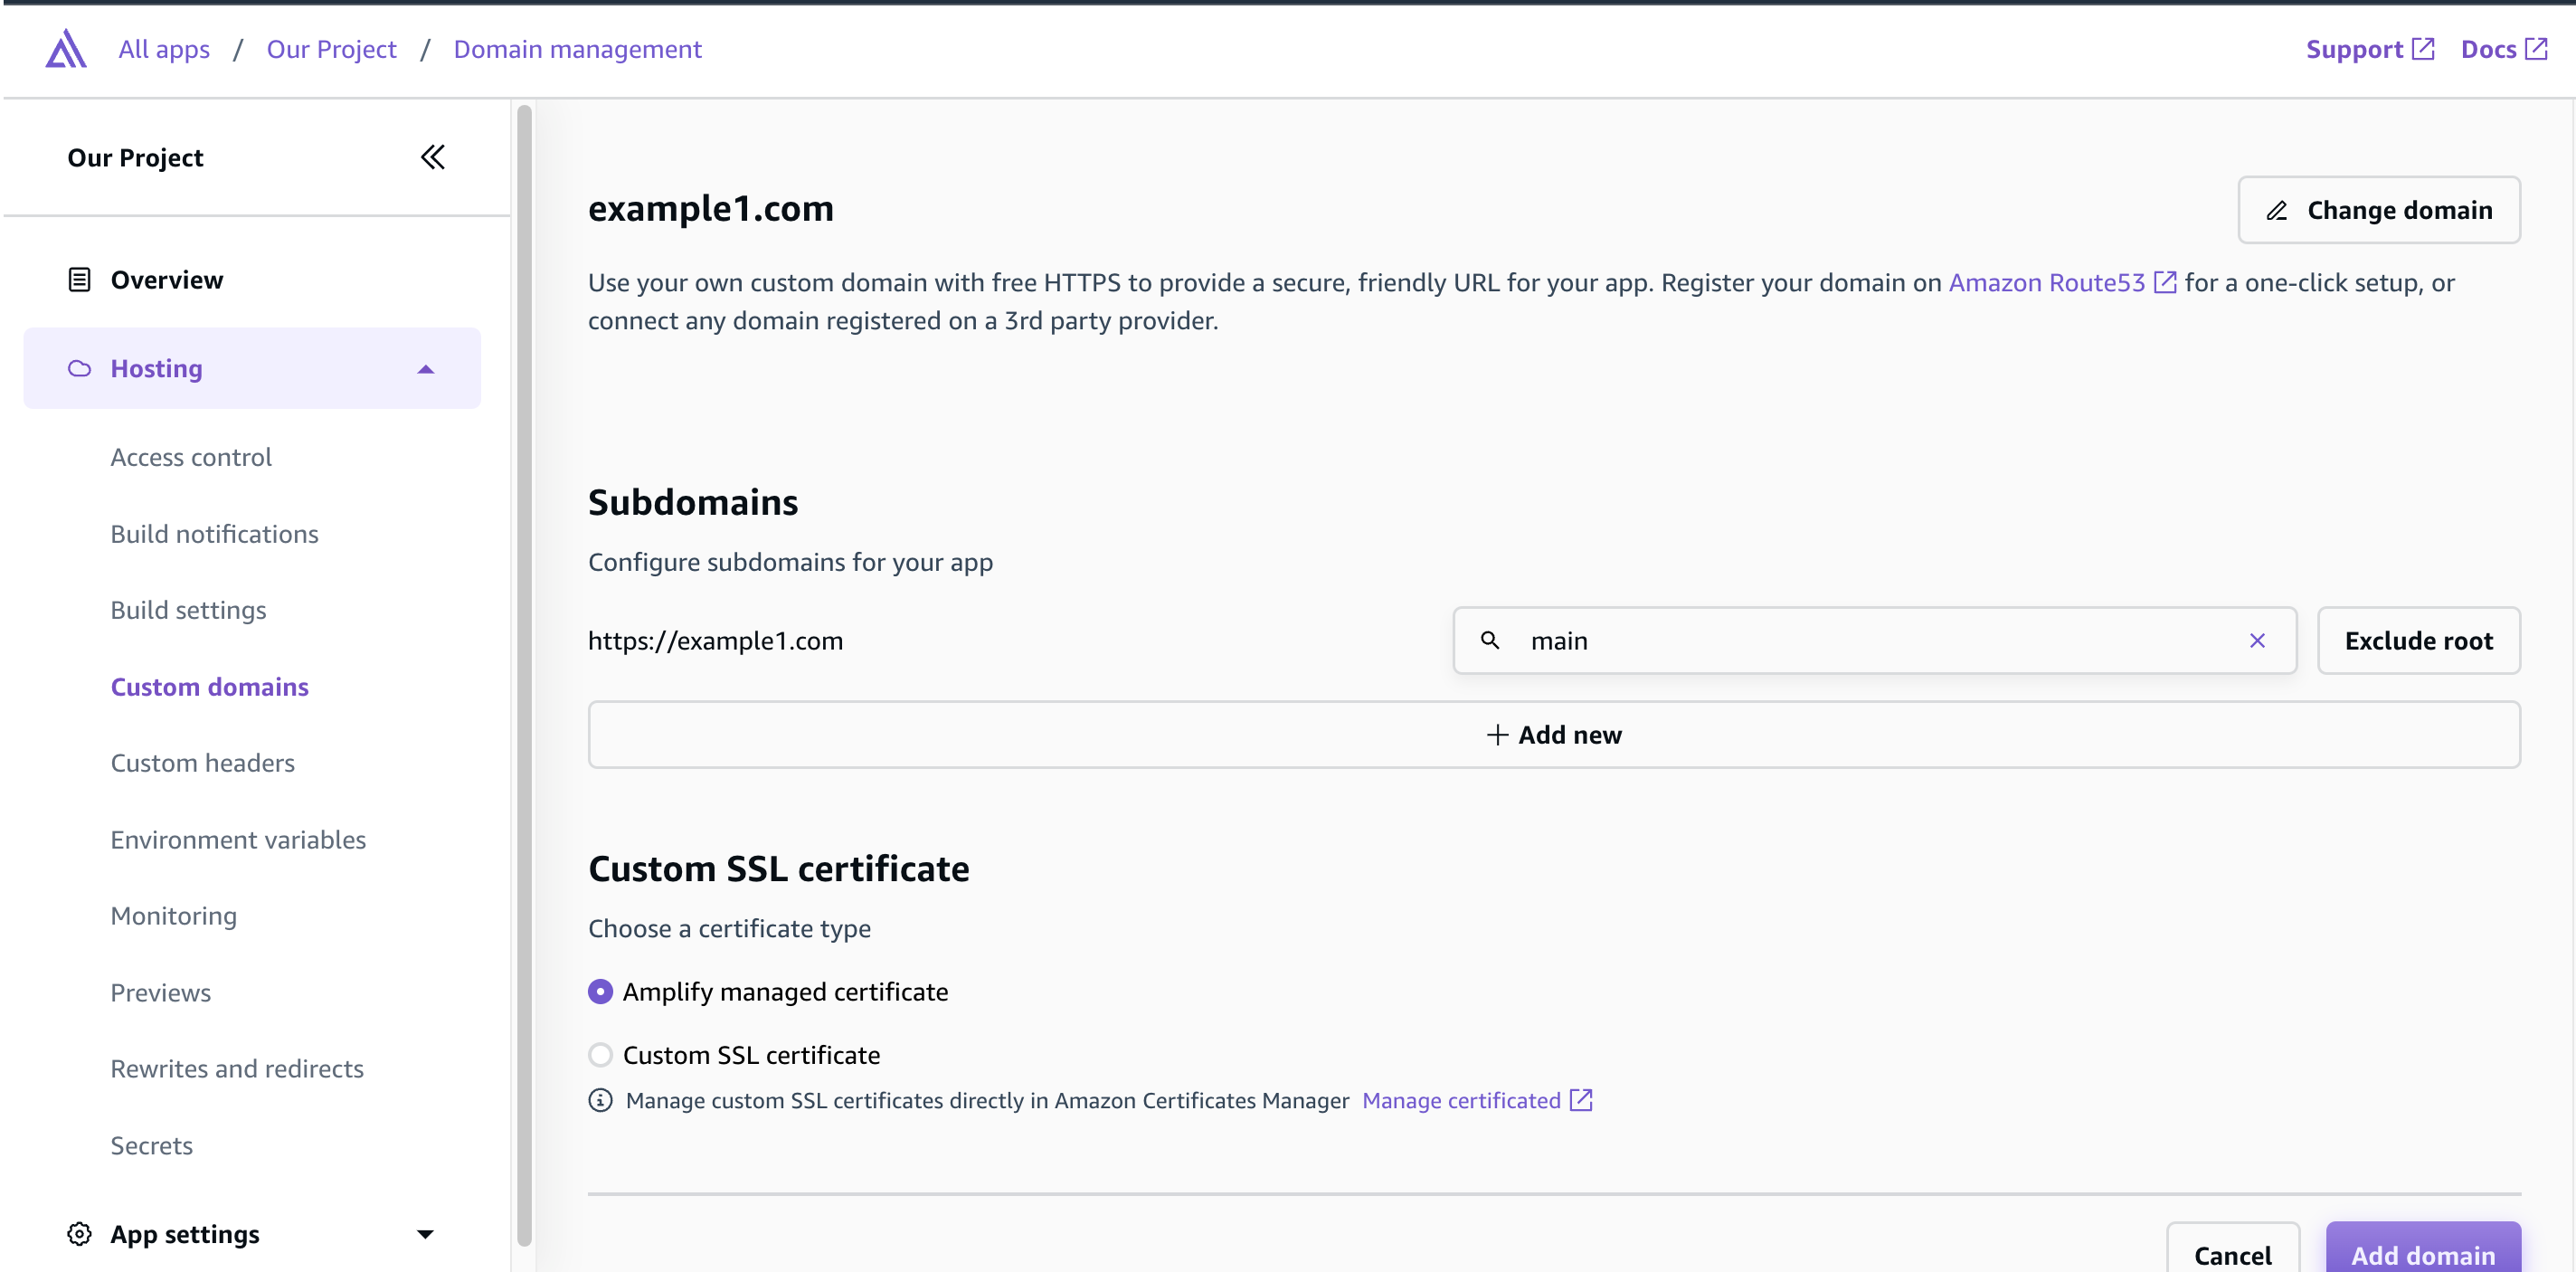
In this page you can add an SSL certificate, either custom or Amplify managed (anything you choose to ) and finally click on the Add Domain button. Once you are done, it will take a while to set up the SSL certificate .
Now when you open up your domain name(e.g. example.com ) in your browser, you can see your app running perfectly.
Note : After you update the NS (Name server) in your domain hosting provider account, the domain requires almost 24 to 48 hours for propagation across all the servers throughout the internet.
Congratulations !! you have hosted your react app to AWS Amplify.
Deleting the app
To delete the app, you can go to the App Settings > General Settings menu and you will find a delete option to delete this app completely .
Also once an app is deleted, you may also want to remove the hosted zone from Route 53 account if you no longer use the domain, to reduce the charges incurred on those AWS services.
Happy blogging!!
Other Blogs from this series


